|
|
|
AT Commander's
"Joe House"
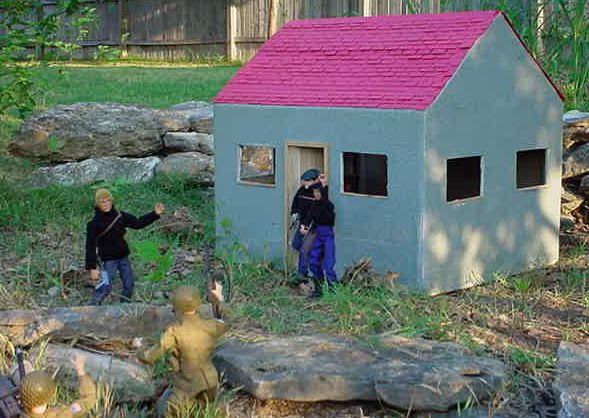
We recently picked up a new TV, I thought the box was more fun than its contents (sorta like being 4 years old again). Here's a Joe House we made for diorama or for play. It's a single-story building that we wanted to look like an abandoned structure for use as a French farmhouse or as a blockhouse. It couldn't have any fragile external parts, or they'd probably get damaged during storage, transit, or use. Thus, we ended up with a simple grey building with no eaves.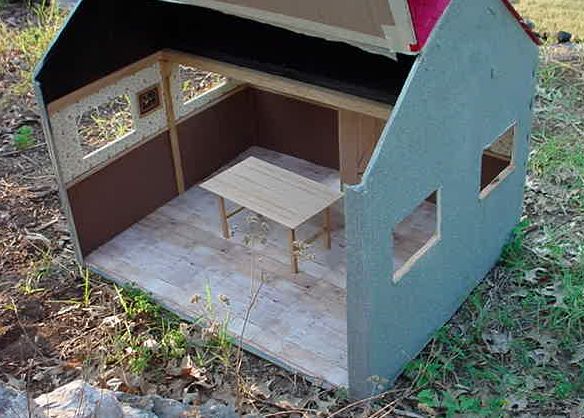 Here's a view of the back with the rear wall and roof section raised. You
can see the wood beams we added around the ceiling on the 1st floor and the
beam holding up the loft. The walls are covered with dollhouse wallpaper,
and the floor is covered with plank stationery we picked up at an office suply
store. The lower part of the walls (below the chair rails) is ordinary brown
construction paper. You can also see the window sills we added that are
also made of wood. The picture on the wall was for a dollhouse from a Hobby
Lobby store. You can see the ugly masking tape and bare cardboard underneath
the roof that are covered by the paint and trim visible elsewhere.
Here's a view of the back with the rear wall and roof section raised. You
can see the wood beams we added around the ceiling on the 1st floor and the
beam holding up the loft. The walls are covered with dollhouse wallpaper,
and the floor is covered with plank stationery we picked up at an office suply
store. The lower part of the walls (below the chair rails) is ordinary brown
construction paper. You can also see the window sills we added that are
also made of wood. The picture on the wall was for a dollhouse from a Hobby
Lobby store. You can see the ugly masking tape and bare cardboard underneath
the roof that are covered by the paint and trim visible elsewhere.
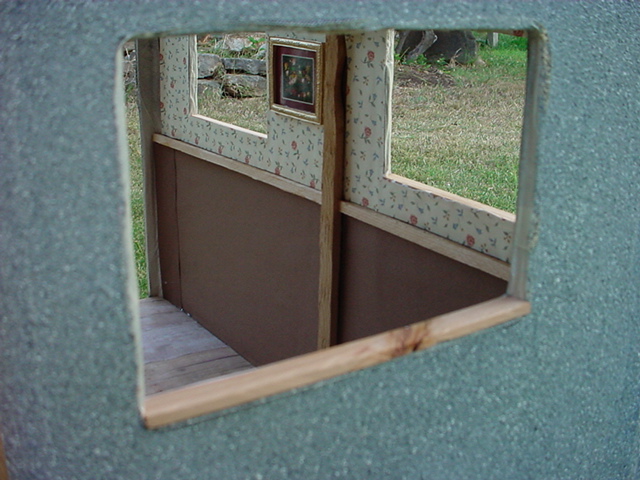
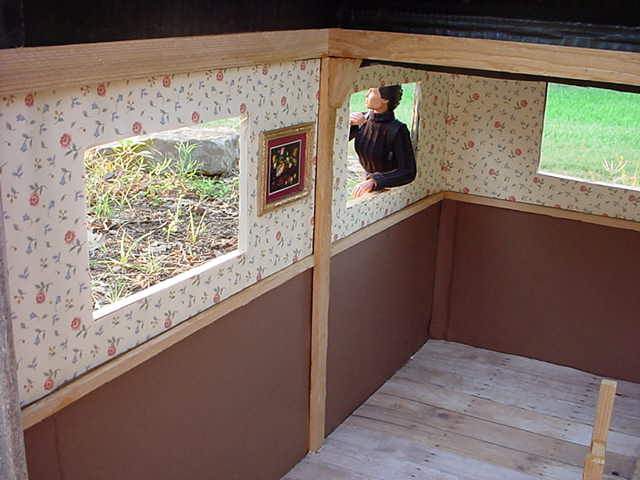 Here's another view of the house, clearly depicting the window sills and
the trim as well as the interior detailing. The windows weren't measured
very conscientiously. I stood a Joe up in a shooting position with an SMG
and cut the first window at that height. Then I made the others match. At
right you can see more of the interior detailing (and catch a glimpse of Jane
outside leaning on the window sill).
Here's another view of the house, clearly depicting the window sills and
the trim as well as the interior detailing. The windows weren't measured
very conscientiously. I stood a Joe up in a shooting position with an SMG
and cut the first window at that height. Then I made the others match. At
right you can see more of the interior detailing (and catch a glimpse of Jane
outside leaning on the window sill).
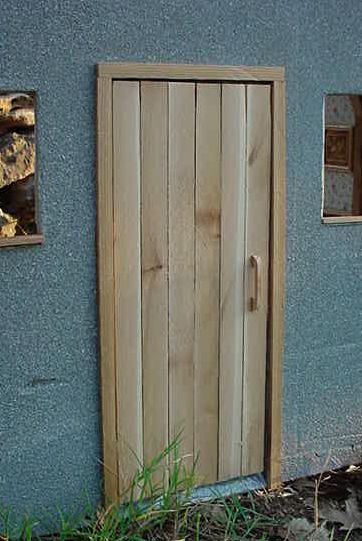 Here's the front door. I was working on a Cub Scout project and had some
leftover slats of wood. I had an epiphany and decided they looked like planks
in 1/6 scale, so I used them to make a door. I just glued the planks to a
piece of cardboard backing and added a wooden door handle I fabricated out
of a piece of scrap wood. I added some more of the wooden trim around the
door (same size I used for the window sills), just for fun. In each of the
windows, you can see the edges of the wooden window sills.
Here's the front door. I was working on a Cub Scout project and had some
leftover slats of wood. I had an epiphany and decided they looked like planks
in 1/6 scale, so I used them to make a door. I just glued the planks to a
piece of cardboard backing and added a wooden door handle I fabricated out
of a piece of scrap wood. I added some more of the wooden trim around the
door (same size I used for the window sills), just for fun. In each of the
windows, you can see the edges of the wooden window sills.
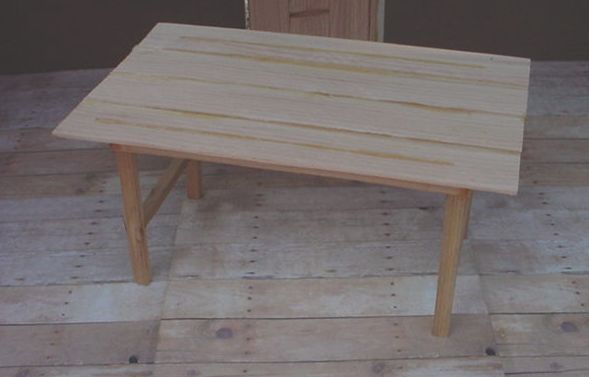
 Here's a table I made from the same "planks" that I picked up from the floor
around my table saw. You can see the ugly carpenter's glue where I cobbled
it all together. I added some reinforcement underneath to make it a little
stronger. It's the right height for Joes to use for maps and charts. These
pics also show the cool y plank-looking stationery I used for flooring.
Here's a table I made from the same "planks" that I picked up from the floor
around my table saw. You can see the ugly carpenter's glue where I cobbled
it all together. I added some reinforcement underneath to make it a little
stronger. It's the right height for Joes to use for maps and charts. These
pics also show the cool y plank-looking stationery I used for flooring.
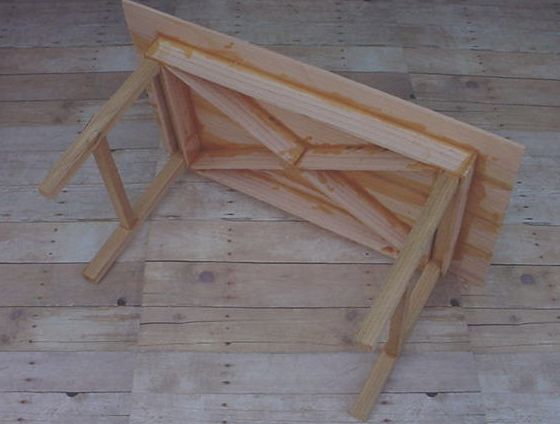
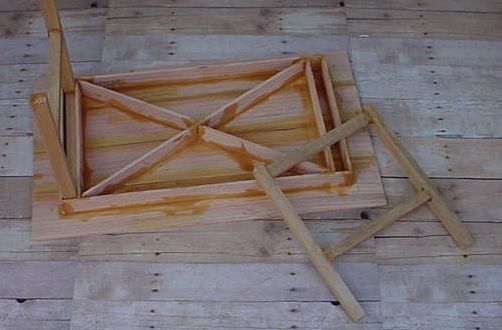 The legs on the table are removable, for easy storage or transport. I built
long channels for the leg braces to slip into. They are not glued in, so
they can be easily removed. Tip for the future: use Elmer's white glue,
not the super-strong carpentry glue. I was pretty disappointed with the yellowish
tinted glue visible everywhere. I'm not concerned enough to do it over again,
but still it was a bummer.
The legs on the table are removable, for easy storage or transport. I built
long channels for the leg braces to slip into. They are not glued in, so
they can be easily removed. Tip for the future: use Elmer's white glue,
not the super-strong carpentry glue. I was pretty disappointed with the yellowish
tinted glue visible everywhere. I'm not concerned enough to do it over again,
but still it was a bummer.
This wasn't really a project that took a lot of time. None of our projects
are very time-consuming (with very little free time, they've got to be "quick
builds" or they don't get done!). This house with its flip-up rear wall gives
the kids a lot of play value indoors or out and inside the house or out.
Yes, we still watch the TV that came in this box, but I still think the
box is more fun! ;-)
LMK what you think of this project or anything else you stumble across
on my humble little site!
Back to the GIJOE Adventure Team home page
![]()
Email me at ATCommander@adventureteam.com (put the word "Sandbox" in the subject line somewhere!) ![]()