|
|
|
AT Commander's
Safari Tent
A 2-piece shelter system
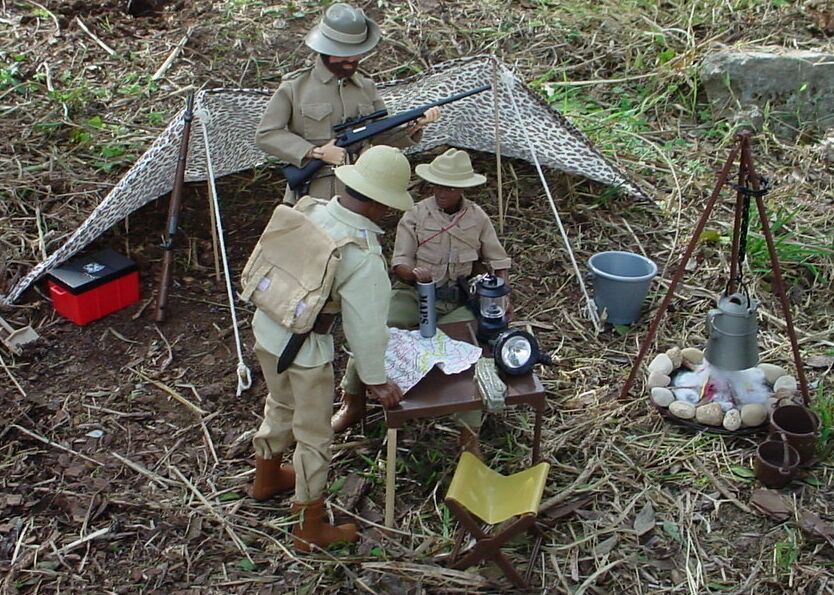
This is a tent we made
for our Joes. In the pic above, you can see Anti-Poacher Joe, his sidekick
Jane, and Explorer Joe looking over some maps to plan the day's action. This
tent came about because the original Action Soldier tent was awful for play
value... it was really too small to be useful for anything besides a diorama
prop. You couldn't play in it, or even lay down a Joe "comfortably." If the
tent were a bit larger it would solve the "cramped space" problem. If you
could get inside it to play, it'd have more value, too! If it was TOO big,
it'd be difficult to pack. We needed a larger tent that you could see in
and could pack. Here is our solution:
the 2-piece Joe Expedition Tent!
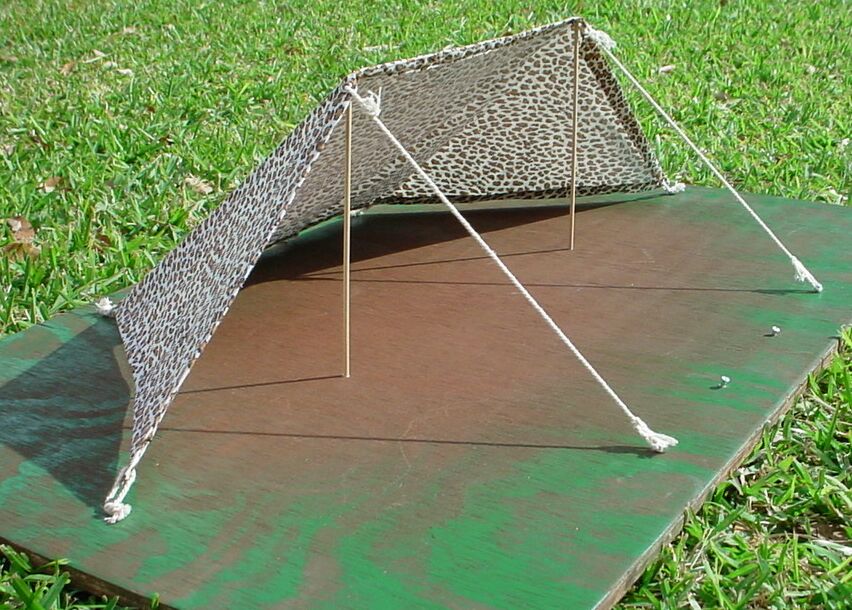
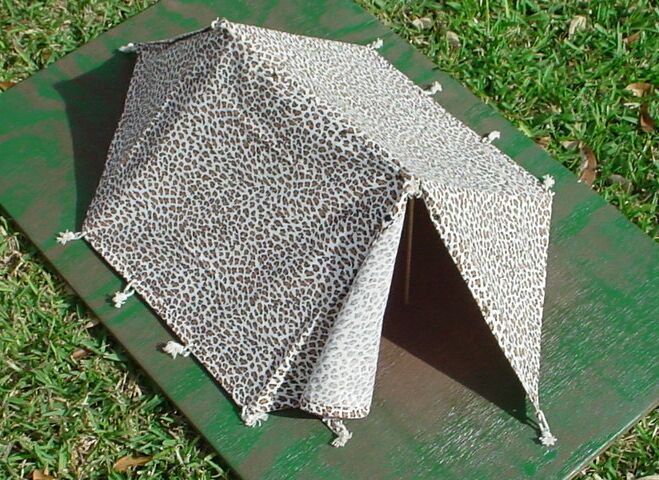
The tent is composed of two identical shelter halves that can be set up singly or paired up to make a tent shelter. As you can see in the pic at right, it is a LOT more roomy than the original Action Soldier tent!
We made a wooden platform to pitch the tent
(either in lean-to or tent configuration) in the house or about anywhere.
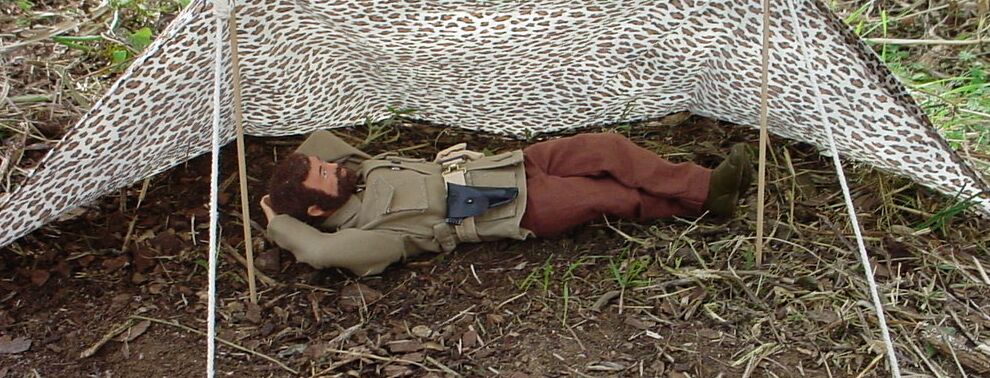
Although we can pitch the tent in the great outdoors, the base makes a lot
of sense and adds versatility. The pic at left shows the lean-to set up
on the base. We used some sheet metal pan head screws as permanent tent
pegs.
Here's the setup with the whole tent assembled
on the base. The mating edges of the shelter halves have alternating male/female
snaps. When assembled in this configuration, the extra-long lean-to ropes
(as seen in the pic above) can be left attached in that manner or allowed
to hang freely inside the assembled tent (doesn’t matter which).
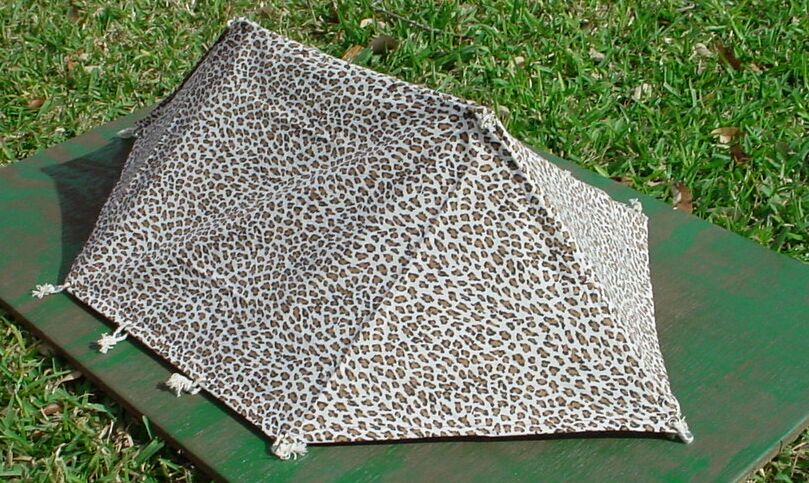
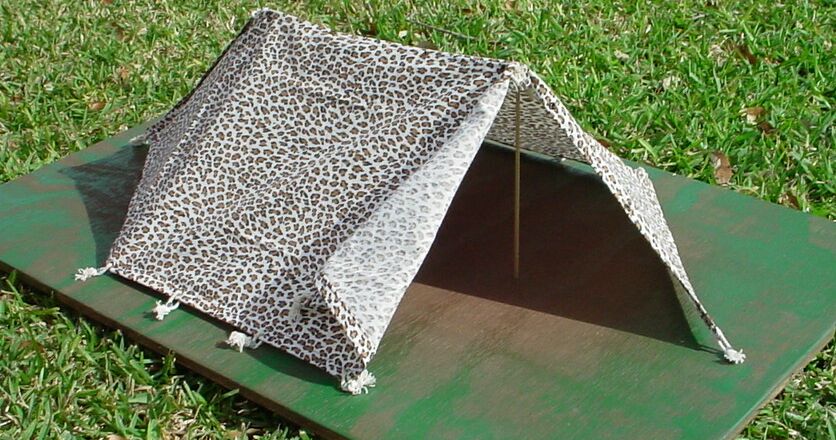
Here's a pic of the tent buttoned up tight for bad weather. This tent has proven to be quite useful in many roles. We have made them in tan for desert use, green for military use, and in this groovy leopard print for safari use.
The tent system has a pretty large footprint compared to the original Joe tent (which was the point in the first place). The groovy part is that it tears down into two convenient "backpackable" sections.
Odds and Ends:
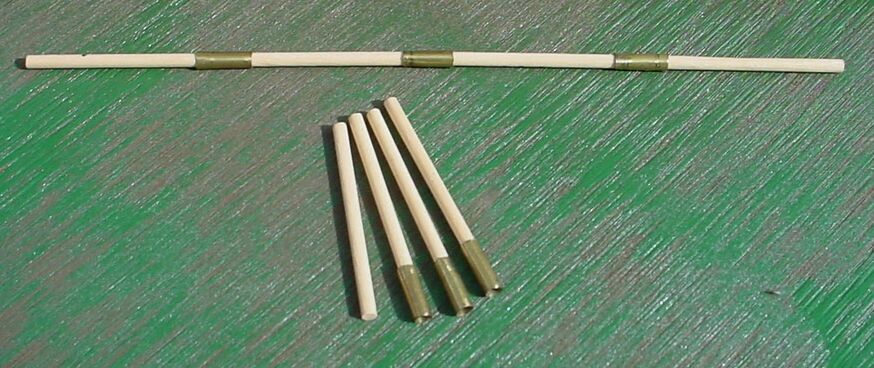
The tent poles in the above pics are all 1-piece. They're great for backyard play or for more permanent setups. The problem with these is that they're too long to fit in a backpack for those long outback treks.
We devised a way to make takedown poles by using the same diameter dowel
and a bit of brass tubing a tad larger in diameter than the dowel.
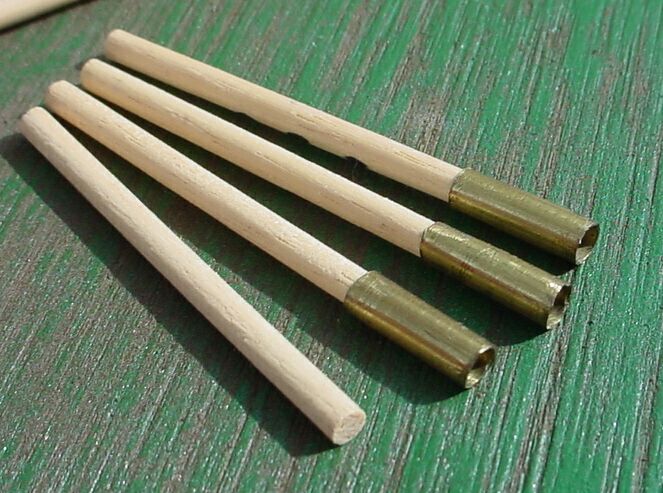
We cut the brass tubing in short lengths and
used a Dremel to bevel one end (to flute it a little bit). The other end
was placed over a length of dowel and peened on (using a nail as a punch).
This dented the brass tubing enough to hold it in place as poles are assembled
or disassembled.
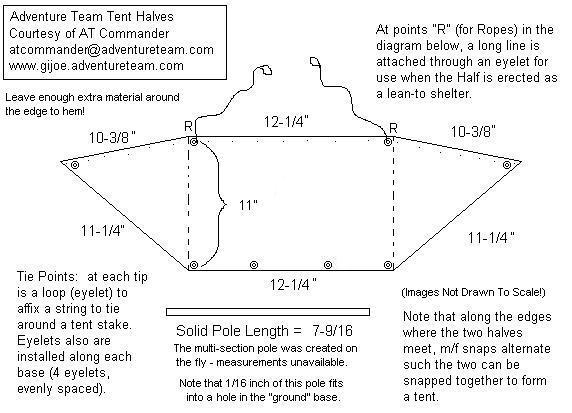
Here's a diagram of the tent design. We made the design out of paper and tried it out, tinkering with the dimensions as necessary. After we got the paper version trimmed the way we wanted it, we used it as a pattern for the cloth shelter halves. Placement of the eyelets isn't critical, but remember to leave enough extra material around the edge of this design to hem. Hemming the edges will prevent it from unravelling and will also give it more substance when you drive the eyelet through the fabric. It wouldn't be a bad idea to use some of that fray stop stuff around the eyelet to keep it from fraying when you damage the material be driving in the eyelet. Placement of the eyelets and snaps isn't critical, but when positioning the snaps, be sure to alternate M/F/M/F/M/F to be sure it'll mate up with the other half to make a whole tent. Tinker with these dimensions at will to get the size and shape you want.
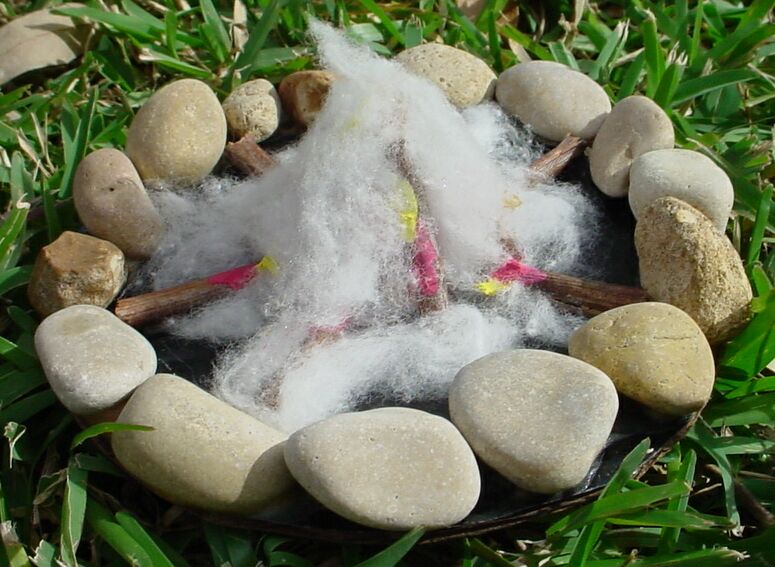
The campfire we use was a fun project for
my 4-year old. We used a round shape painted black as our canvas. Upon
it we painted whatever colors we wanted, added Elmer's Glue and some sand,
a few sticks, some more paint, some cotton balls (all stretched and torn
to look wispy), a hot glue gun, and some stones from the garden. One of
the campfires (we've done several of these) is at left. Mosquitoes were
bad on this safari, so Joe needed a smoky, smoldering fire rather than a
flaming bonfire. This was the result.
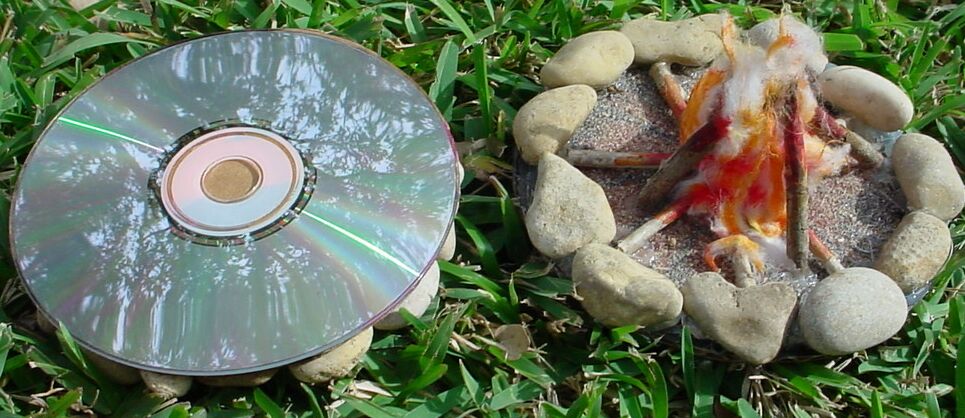
Where did we get the idea for this? Another
sandboxer gave me an Action Man CD that supposedly had a cool game on it,
but in reality it was a "Screw Up Your Compter" CD. After repairing the
damage that the crummy promotional CD did to my machine, I felt like burning
the crummy disk. At that moment, my li'l' JoeHead was in need of a rainy-day
project, so instead of burning the crummy disk we decided to make a whole
campfire out of it! Fun! In the pic above right is the underside of the
"smoldering fire" and another of my li'l' JoeHead's creations. We had fun
with it. This project probably won't satisfy the detail purist, but for
folks who PLAY with Joes, this was a fun and useful "quickie" project!
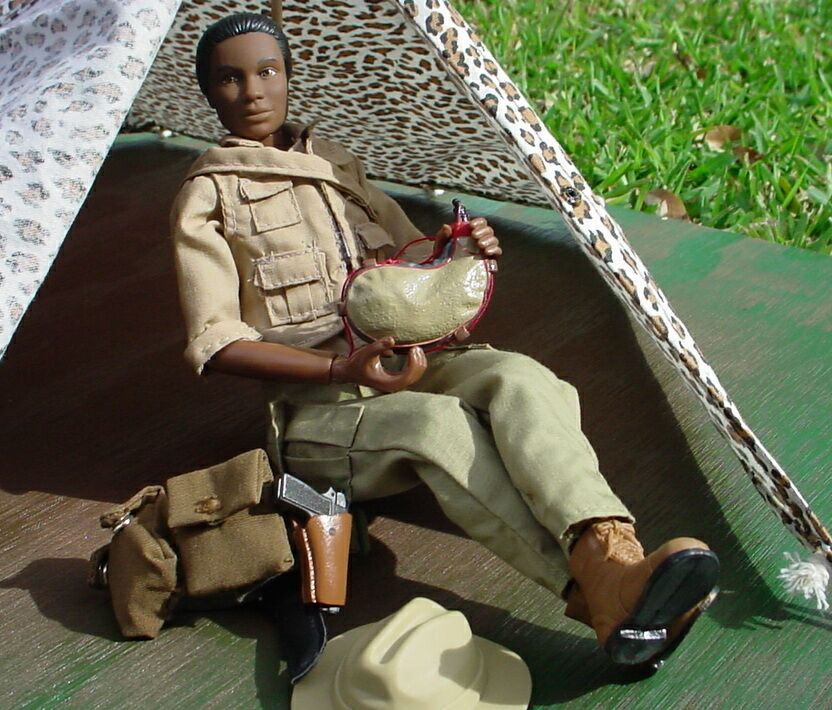
Also in the "odds and ends" category is Jane's attire. Remember those poorly-made crummy 6 or 9 inch Action Jackson figures that were blowing out at $1.99 a while back? We found a good use for 'em. The boots (and gaiters) fit Jane nicely. The multi-pocketed vest fits Jane, too (although it's pretty tight on a Cy Girl). AJ's shirt is great for Jane, but the sleeves are too tight for Jane's big (useful) hands - the sleeves are too short, too. We rolled up the sleeves and put a couple of stitches in them to keep 'em there, and slit the inside seam a tad to allow Jane's hands to fit through. After a minute or two with an X-acto blade, the little AJ .45 holster made a serviceable holster for the Dragon Hi-Power (pictured at right). The Hasbro Save the Tiger chapeau fits Jane nicely as well. The shoulder bag is AJ's the belt, pouch, and canteen are all HAsbro, the Ka-Bar (not visible in the pic) is 21C, and the trousers are original Nurse Jane duds. I have no idea where the bota flask came from - I got it at a JoeClub meeting a while back. All in all, it's a pretty cheap, easy to assemble, adventure outfit for Jane.
Click the logo to go home ![]()
or click the bar to email me, the ATCommander@adventureteam.com ![]()